
Integration
Connect Zoom With Elokencia
Manage all your meetings from one powerful platform Elokencia keeps your communication seamless, organized, and just one click away.
App Authorization Flow
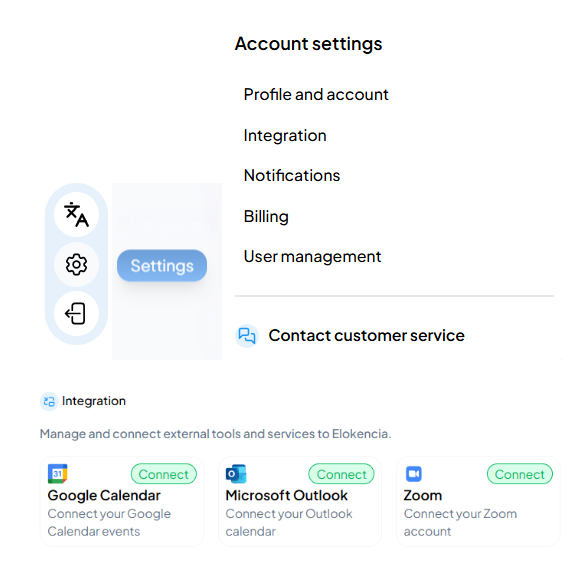
1. Go to the Elokencia platform and click
Settings -> Integration ->Connect
2. Log in using a Zoom account (any valid Zoom account).
3. Approve the requested scopes on the Zoom consent screen
4. The app redirects to the specified callback URL
5. Dashboard confirms successful authorization.
Settings -> Integration ->Connect
2. Log in using a Zoom account (any valid Zoom account).
3. Approve the requested scopes on the Zoom consent screen
4. The app redirects to the specified callback URL
5. Dashboard confirms successful authorization.
Features to Test
Feature1 : Connect Zoom (User must have a valid Zoom account.)
Steps: Click Connect Zoom, authorize, redirect
Expected Result: User is connected and token saved
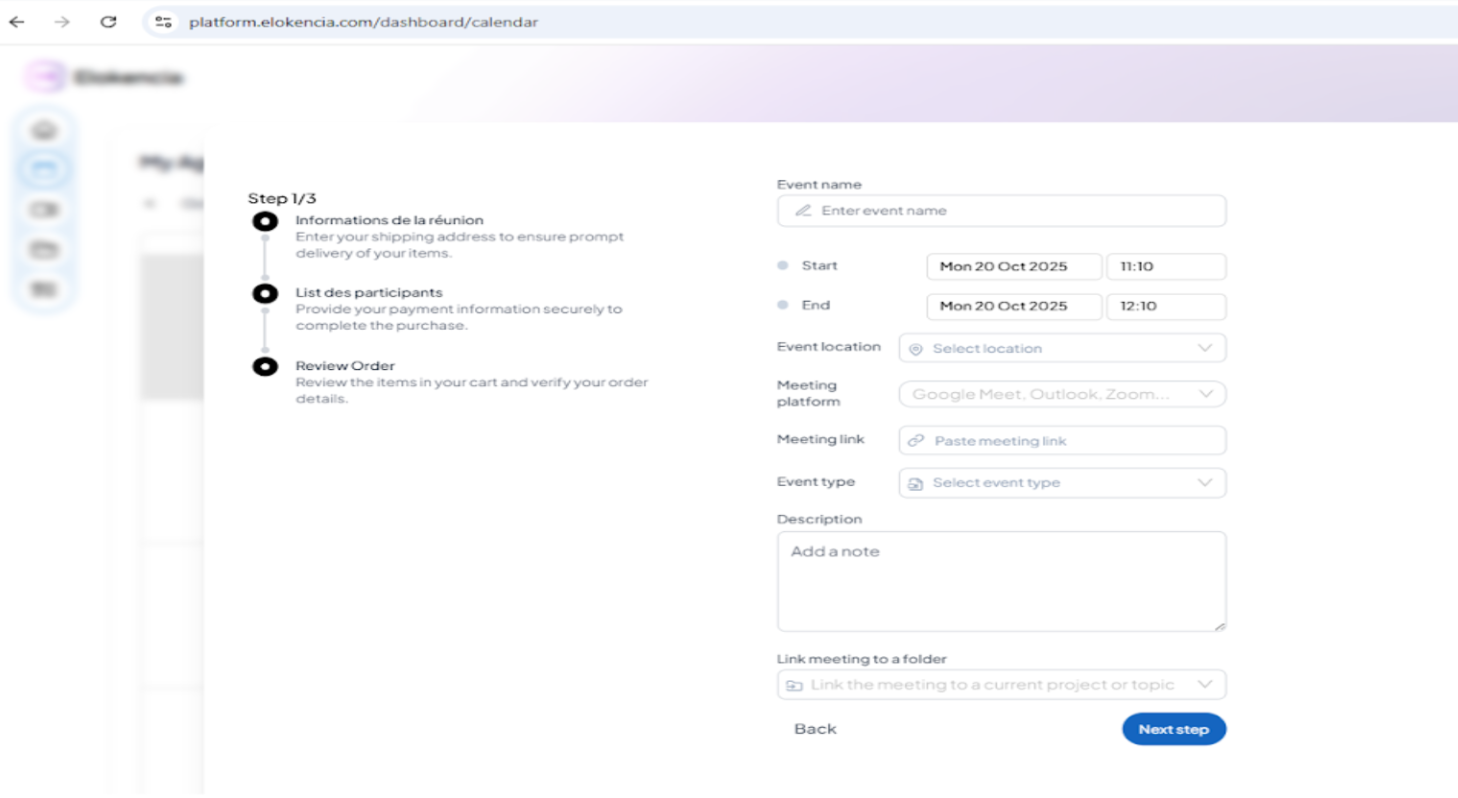
Feature2: Create Zoom Meeting( User must be connected to Zoom and have authorization approved.)
Steps: Click Create Meeting, fill topic/date/time, submit
Expected Result: Meeting link is generated and appears in Zoom account
Feature3 : View Meetings(Meetings must exist in Zoom for the connected account.)
Steps: Open My Meetings
Expected Result: List of meetings retrieved from Zoom
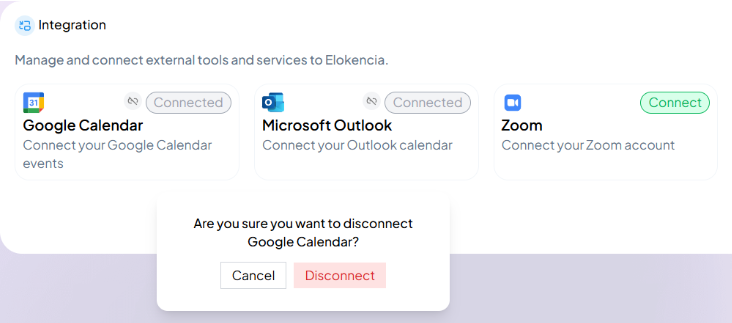
Feature4: Disconnect Zoom(User must have previously authorized the app.)
Steps: Click Disconnect
Expected Result: Token revoked, dashboard shows disconnected
Steps: Click Connect Zoom, authorize, redirect
Expected Result: User is connected and token saved
Feature2: Create Zoom Meeting( User must be connected to Zoom and have authorization approved.)
Steps: Click Create Meeting, fill topic/date/time, submit
Expected Result: Meeting link is generated and appears in Zoom account
Feature3 : View Meetings(Meetings must exist in Zoom for the connected account.)
Steps: Open My Meetings
Expected Result: List of meetings retrieved from Zoom
Feature4: Disconnect Zoom(User must have previously authorized the app.)
Steps: Click Disconnect
Expected Result: Token revoked, dashboard shows disconnected
Deauthorization Flow
Log in to the test Zoom account.
Go to Settings -> Integration ->Disconnect .
Expected Result:Platform detects revoked token.
Zoom-related data removed from the platform as per privacy policy.
Go to Settings -> Integration ->Disconnect .
Expected Result:Platform detects revoked token.
Zoom-related data removed from the platform as per privacy policy.
Error Handling
Scenario1 : Invalid/Expired Token
Expected Behavior: Prompt user to reconnect Zoom account
Scenario2: Authorization Denied
Expected Behavior: Display "Authorization cancelled"
Scenario3: Network/API Error
Expected Behavior: Show user-friendly error message
Troubleshooting / Support:If you cannot connect to Zoom, ensure your account is valid and authorized.
If meetings do not appear, refresh the dashboard or reconnect Zoom.
For further assistance, contact contact@elokencia.com.

© 2025 - All rights reserved.